 Tinkercaster
Pickups & parts
Gibson vs Fender pickup wire colour codes
Gibson and Fender codes from their own wiring sheets, the Seymour Duncan, DiMarzio, Tonerider and Fralin 4-conductor codes, where the charts disagree, and how to identify unknown leads with a meter.
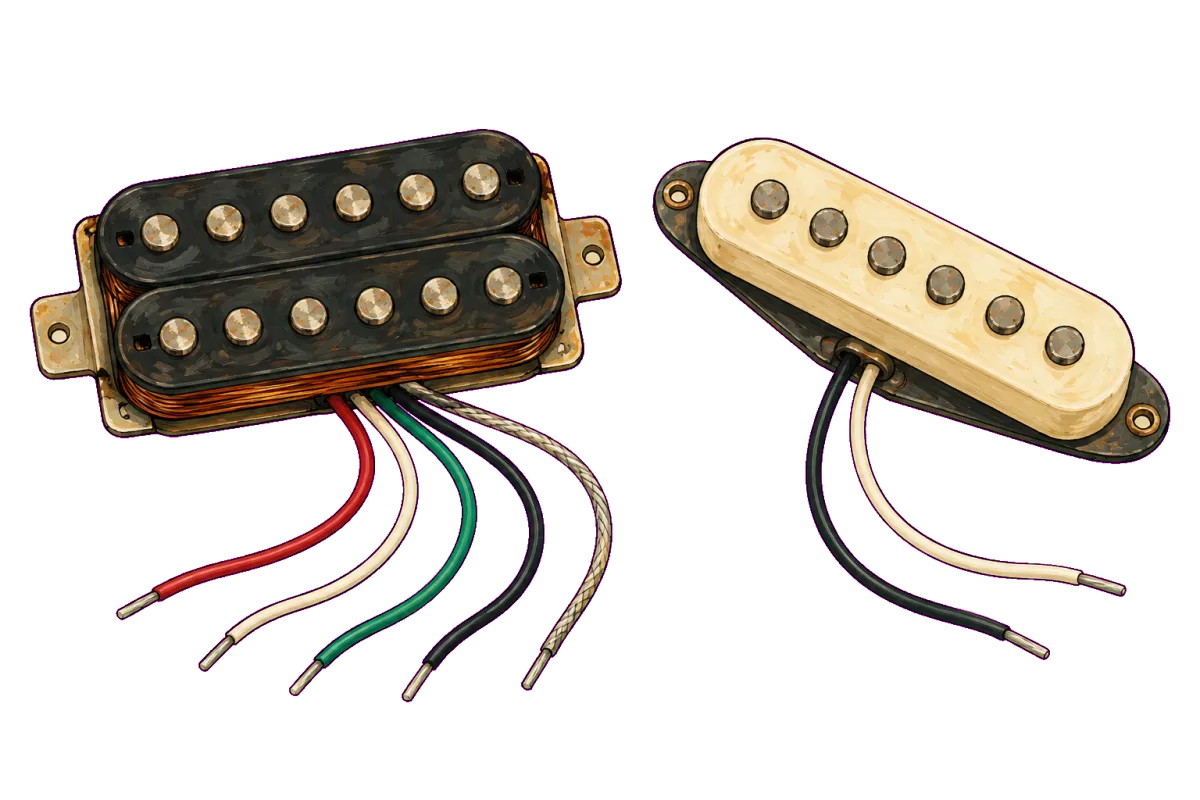
Neither Gibson nor Fender has one colour code. Each has a code per pickup family, and the sheet for your exact pickup is the authority. On Gibson’s own sheet for its four-conductor humbuckers (490R/490T, 498T, 496R, 500T, Tony Iommi), red is hot, green and white are the series link, and black goes to ground with the shield. Gibson’s vintage-style humbuckers use a single conductor with a braided shield. Fender’s American Vintage Strat single coils use white for hot and black for ground. Its American Vintage Tele set uses white and black on the neck and yellow and black on the bridge. Fender’s American Standard HSS Shawbucker drawing joins red and green as the series link, which is not what two widely used aftermarket charts predict for “Fender”.
Aftermarket humbuckers are more consistent within a brand, but they differ between brands. Seymour Duncan uses black for hot, and DiMarzio and Tonerider use red. Below is each code as the manufacturer documents it and how our 330 library diagrams apply it, with notes on where sources disagree and on identifying leads when you do not know the code.
What each lead does
A side-by-side humbucker has two coils and therefore four coil ends, plus a bare shield. Whatever the colours, the leads do four jobs in standard series wiring:
| Job | What it is | Where it goes |
|---|---|---|
| Hot | One end of the first coil | Switch, volume input or preamp |
| Series link (two leads) | The finish of one coil and the finish of the other | Joined to each other and insulated from everything |
| Ground (return) | The remaining end of the second coil | Pot casing or ground network |
| Bare shield | The braid or foil around the lead, bonded to the baseplate | Ground |
The link carries signal. It is the midpoint between the two coils, so it must be insulated. If it touches ground, the second coil is shorted out and you have an accidental coil split. An intentional split works the same way: Seymour Duncan’s humbucker internals article describes splitting as a switch that “grounds both of those wires”, the red and white link. So a pickup that sounds thin, quieter and noisier after installation may have a link joint touching a casing or shield.
Gibson, from Gibson’s own sheet
Gibson’s pickup wiring sheet covers three families:
| Gibson family (as the sheet names it) | Leads | Hot | Series link | Ground |
|---|---|---|---|---|
| Four conductor models: 490R/490T, 498T, 496R, 500T, Tony Iommi Sig. | Red, white, green, black, shield | Red “to controls” | Green and white, “solder together & tape” | Black and shield |
| Vintage style two conductor models: ’57 Classic, P-90, ’57 Classic Plus, P-100, Angus Young Sig., BurstBucker | Single conductor with shield | Centre conductor “to volume pot or selector switch” | Made inside the pickup | Shield |
| P-94R and P-94T | White, black, green twisted with bare | Either white or black | Not applicable | The other of white or black, plus green and bare |
The sheet also covers phase, coil taps and a dead lead.
- For phase on the four-conductor models: “If pickup is out of phase with existing pickup, reverse black and red leads.”
- For a coil tap, Gibson draws an SPDT on/on mini-toggle giving “Single Coil” and “Humbucking”, and a DPDT on/on for series/parallel. Our series vs parallel wiring article covers what that switch does.
- On the P-94, “there may be a red wire included, this is a ‘dead’ lead which you may cut”. Using the black lead as hot on one P-94 and the white on the other gives hum-cancelling operation with both on.
The sheet is a snapshot of those models. Gibson uses both braided single-conductor leads and four-conductor leads across its product lines, so identify your pickup’s model and era before you assume a code.
Fender, from Fender’s own sheets
Fender’s single-coil sheets are short and explicit. Its American Vintage Strat pickups diagram (P/N 0992235999, 2013) runs each pickup’s white wire to the switch and its black wire to ground. The same wiring applies to its modern 5-position and vintage 3-position versions. Its American Vintage Tele pickups diagram (P/N 0992233999) labels the neck pickup’s leads white and black and the bridge pickup’s yellow and black. White and yellow go to the 3-way switch, with 250K pots in both its modern and vintage wiring.
Fender humbuckers are where the documentation gets thin. Fender’s service drawing for the American Standard Stratocaster HSS Shawbucker (011311XXXX) labels one pickup joint in its text: “solder & shrink tube red & green wire”, the series link, plus the bare wire. It does not label the other two leads in text. We could not find a Fender document that sets out one humbucker code for all its models, and we do not give one.
Where the charts disagree about Fender
Two aftermarket cross-reference charts list a single “Fender” humbucker code. Seymour Duncan’s colour code chart, which we transcribe in our Seymour Duncan wire colours guide, gives Fender as north start green, north finish white, south finish black and south start red. Tonerider’s pickup wiring colour codes lists the same four colours in the same order.
On that chart’s logic the two finishes, white and black, would form the series link. Fender’s own Shawbucker drawing joins red and green. Both cannot describe that pickup. For a Fender pickup, follow Fender’s drawing for that model. Treat a “Fender” row on a cross-reference chart as covering only some Fender pickups.
The same chart’s Gibson row (north start red, north finish white, south finish green, south start black) agrees with Gibson’s four-conductor sheet: red hot, white and green linked, black to ground.
The aftermarket 4-conductor codes
| Maker | Hot | Series link | Ground | Primary source |
|---|---|---|---|---|
| Seymour Duncan | Black | Red + white | Green + bare | Sheet 2H_3G_1V_1T: “Red & White wires get soldered together and taped off” |
| DiMarzio | Red | Black + white | Green + bare | DiMarzio 4-conductor instructions and FAQ |
| Tonerider | Red | Black + white | Green + bare | Tonerider’s chart lists its code as identical to DiMarzio’s; our Tonerider diagrams below |
| Lindy Fralin | White (screw coil start) | Red + green | Black (slug coil start) | Fralin series/parallel article |
| Gibson four-conductor | Red | Green + white | Black + shield | Gibson pickup wiring sheet |
Fralin’s humbucker colour code guide states the translation directly: “Seymour Duncan’s Black is our White”, and “their Red is our White” for Gibson. It opens with the reason these translations exist: “there is no industry standard regarding humbucker color codes.”
DiMarzio’s instructions warn that “although other brands of pickups may have the same color wires as ours, the connections are not necessarily the same.”
How our library applies them
Every diagram in our library records which colour code each pickup is drawn in, and every joint the sheet tells you to insulate. Across all 330:
- 176 Seymour Duncan diagrams draw humbuckers in Seymour Duncan colours. Every insulated series-link joint they draw joins red and white: 74 joints across 41 diagrams.
- 41 DiMarzio diagrams and 31 Tonerider diagrams draw humbuckers in DiMarzio colours. Their insulated link joints join black and white (41 joints across 27 diagrams), with one exception, described below.
The other diagrams route the link through a switch (for splits and series/parallel) instead of taping it off, so no insulated joint is drawn.
Seymour Duncan colours: two humbuckers, one volume, one tone, drawn by Tinkercaster from Seymour Duncan sheet 2H_3G_1V_1T.
Parts, connections and bench checks ↗Open interactive diagram ↗On Seymour Duncan’s 2H_3G_1V_1T, each pickup’s black goes to its toggle lug, each green and bare goes to the volume casing, and each pickup’s red is joined to its white and taped off. On Tonerider’s 2_HB_1V_1T, the same circuit uses different colours: each red goes to its toggle lug, green and bare go to the volume casing, and black is joined to white. The diagram’s bench check makes the insulation requirement testable: each taped black and white joint must read open to ground.
DiMarzio-style colours on a Tonerider sheet, drawn by Tinkercaster from Tonerider sheet 2_HB_1V_1T_3-way_toggle.
Parts, connections and bench checks ↗Open interactive diagram ↗When you swap one maker’s pickup for the other’s, match the leads by job. Seymour Duncan’s black goes where DiMarzio’s red went, and Seymour Duncan’s red and white link replaces DiMarzio’s black and white link. Green and bare stay on ground in both.
Same colours, different jobs, within one maker
The one exception in our DiMarzio set shows why you need the sheet for the exact pickup. DiMarzio’s Rail Hum-Canceling Tele sheet pairs two DiMarzio pickups with different connections:
| Pickup on the sheet | Hot (to switch) | Joined and insulated | To the volume casing |
|---|---|---|---|
| Area T neck | Red | Black + white | Green + grey |
| The Chopper T bridge | Black | Red + green | White + bare |
DiMarzio Rail Hum-Canceling Tele, drawn by Tinkercaster from DiMarzio's Tele Rail Hum Canceling Wiring sheet.
Parts, connections and bench checks ↗Open interactive diagram ↗Both are DiMarzio pickups on one DiMarzio sheet, and the bridge pickup’s colours do different jobs from the neck’s. The sheet also specifies 250K custom-taper pots, a .022 µF capacitor and a Switchcraft two-conductor jack. Its bench check: “The taped series joints on both pickups should read open to ground.”
Phase reversal follows each maker’s own rule. DiMarzio: “reverse the red and green wires. Solder the RED wire to ground, and the GREEN wire to hot.” Gibson (four-conductor): “reverse black and red leads”. Our Seymour Duncan phase reversal guide covers the Seymour Duncan case. You can only reverse phase at the pickup if its hot and ground are separate leads. A single-conductor braided lead cannot be reversed that way. Fralin makes the same point about Gibson-style braided lead.
Single coils
| Pickup and sheet | Hot | Ground | Notes |
|---|---|---|---|
| Fender American Vintage Strat set | White | Black | Same in modern and vintage wiring |
| Fender American Vintage Tele, neck | White | Black | |
| Fender American Vintage Tele, bridge | Yellow | Black | |
| DiMarzio Twang King (Standard Tele sheet) | White | Grey and black | Our drawing |
| Tonerider four-way Tele, neck | Yellow | Black goes to the switch; green is the cover ground | Our drawing |
| Tonerider four-way Tele, bridge | White | Black | Same drawing |
Tonerider’s four-way Tele puts yellow on the neck, while Fender’s American Vintage Tele puts yellow on the bridge. That is harmless once you know it, and confusing if you wire from memory. Our Telecaster 4-way switch article explains why the Tonerider neck needs a separate cover ground.
Identifying leads when you do not know the code
A multimeter can separate the coils, find the shield and confirm the link. It cannot tell a coil’s start from its finish. Do this with the pickup out of the guitar, or at least disconnected from the harness.
- Find the shield. Continuity from a lead to the baseplate or cover identifies the bare shield. On a four-conductor pickup, no coloured lead should show continuity to the baseplate.
- Pair the coils. Measure resistance between every pair of coloured leads. Two pairs show a coil’s resistance, and every cross-pair reads open. Each pair is one coil. If only three coloured leads exist, the link has been made inside the pickup and brought out as one lead (Fralin’s 3-conductor lead does this), so check the maker’s sheet.
- Identify the slug and screw coils. Screw pole pieces show which coil is which, and the maker’s sheet tells you which colours belong to each.
- Choose the link. Join one lead from each pair temporarily with clips. Both possible links give the same DC reading, the sum of the two coils, so the meter cannot tell them apart. The correct link puts the string signals in phase. The wrong one puts them out of phase, so the pickup sounds thin and weak, and the two coils’ hum adds instead of cancelling. Test at low volume with the guitar strung, unplug before changing the clips, and swap one coil’s two leads if the result is thin.
- Set phase against the other pickups. With the link correct, if the pickup sounds thin only when combined with another pickup, reverse its hot and ground, following the maker’s phase rule above.
Record what you found on the harness drawing before you solder, and insulate the link joint as the sheets say. Our multimeter course covers continuity mapping and pickup measurement, and the coils and leads chapters of the wiring course cover lead types. If a pickup is silent rather than thin, start with how to fix a dead pickup.
Solder with the guitar unplugged from any amp, use fume extraction, and wash your hands after handling leaded solder. See the soldering cheat sheet.
Next step
Open Seymour Duncan’s 2H_3G_1V_1T and Tonerider’s 2_HB_1V_1T side by side and trace the hot, link and ground on each. Then read the Seymour Duncan wire colours guide. The library, guides and pickup catalog are free to browse, and you can put your own pickups on a board for free and let the wiring checks confirm the series link before you solder. Tinkercaster Pro adds Luthier, the AI assistant (with a usage limit), and guided builds. For choosing pots for the new pickups, see 250k vs 500k pots.
References
From the Tinkercaster library
- Two humbuckers, three-way toggle, one volume and one tone (Seymour Duncan 2H_3G_1V_1T): Seymour Duncan colours in use.
- Two humbuckers, three-way toggle, one volume and one tone (Tonerider 2_HB_1V_1T_3-way_toggle): red hot, black and white link, open-to-ground check.
- Rail Hum-Canceling Tele with two rail pickups (DiMarzio): two DiMarzio pickups with different lead jobs on one sheet.
- DiMarzio Standard Tele wiring and Tonerider four-way Telecaster: single-coil lead colours.
- Guides: Seymour Duncan humbucker wire colours (includes Seymour Duncan’s cross-brand chart), Seymour Duncan phase reversal.
- Catalog: Humbucker (four-conductor, Seymour Duncan colours), Humbucker (four-conductor, DiMarzio colours), Single-coil pickup (two-conductor).
- Courses: Using a multimeter for guitar wiring, The wiring course.
Manufacturer and technical sources
- Gibson pickup wiring diagrams (PDF): four-conductor code for 490R/490T, 498T, 496R, 500T and Iommi; two-conductor models; P-94 leads; phase and tap wiring.
- Fender American Vintage Strat pickups wiring diagram: white to the switch, black to ground.
- Fender American Vintage Tele pickups wiring diagram: neck white/black, bridge yellow/black, 250K pots.
- Fender American Standard Stratocaster HSS Shawbucker service manual: red and green soldered and shrink-tubed as the humbucker’s series link.
- Seymour Duncan sheet 2H_3G_1V_1T: red and white soldered together and taped off.
- Seymour Duncan: humbucker internals explored: coil roles, slug and screw polarity, splitting by grounding the link.
- Seymour Duncan wiring diagram library: source of the colour code chart our guide transcribes.
- DiMarzio: 4-Conductor Pickup Instructions: red hot, black and white link, green and bare ground, phase reversal, same-colour warning.
- DiMarzio: How do I connect a 4-conductor pickup?: standard series connection and phase swap.
- Tonerider: pickup wiring colour codes: cross-brand chart, Tonerider identical to DiMarzio, its Fender row.
- Fralin: Demystifying humbucker color codes: no industry standard; Seymour Duncan and Gibson translations; braided lead cannot be phase-reversed.
- Fralin: Series / Parallel humbucker wiring: Fralin lead roles (black slug start to ground, white screw start as output, red to green series).