 Tinkercaster
Getting started
How to wire a humbucker to a 3-way toggle
Lug-by-lug wiring for two humbuckers on a Switchcraft-style 3-way toggle, from Seymour Duncan, DiMarzio and Tonerider sheets: one volume, Les Paul 50s and modern, and meter checks.
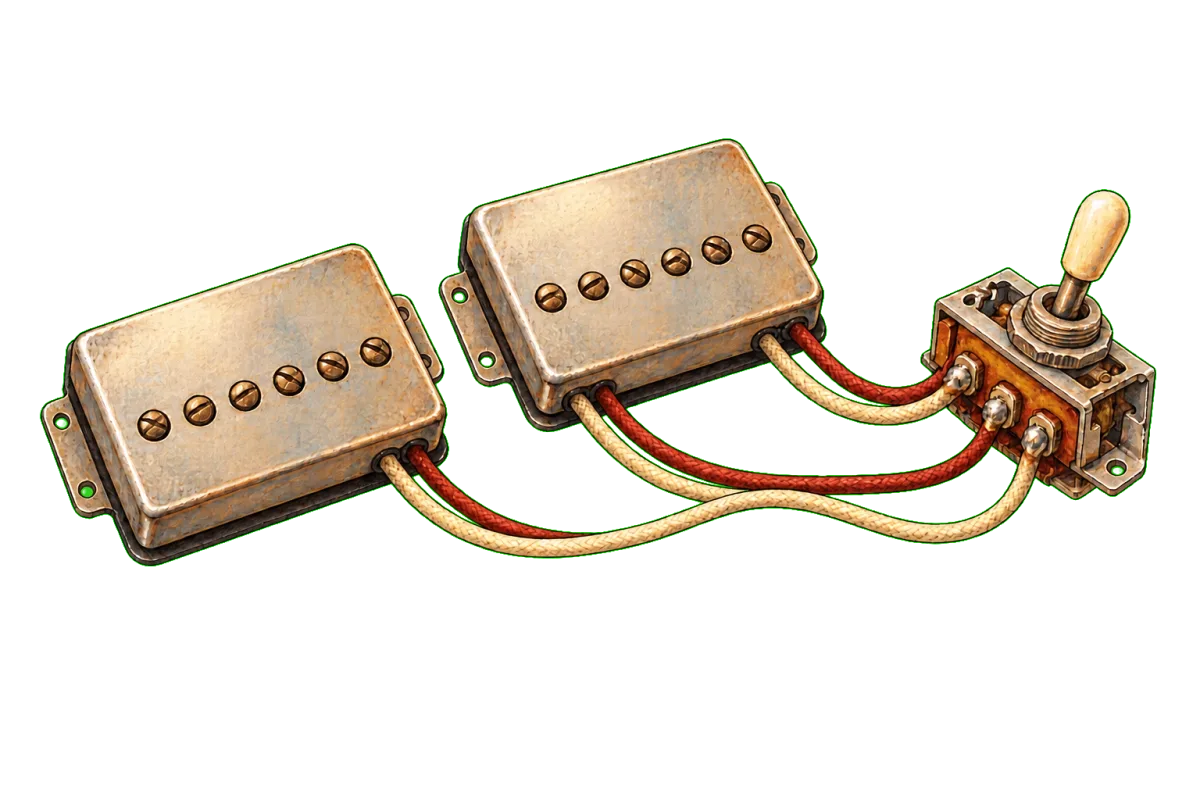
A 3-way toggle in a two-humbucker guitar connects the neck pickup, the bridge pickup or both to a single output. Each pickup’s signal lands on one outer pickup contact, the output contact goes on to the volume or the jack tip, and the frame lug goes to ground. Up is neck, down is bridge, and the middle joins both in parallel. That is how Seymour Duncan’s introduction to 3-way toggle switches describes the Switchcraft-style switch.
This article builds the circuit from three drawings in our library, each drawn from a manufacturer sheet. It names the lugs the way those drawings do and compares how Seymour Duncan, DiMarzio and Tonerider handle the same job. Everything here applies to an open-frame Switchcraft-style toggle, such as the catalog’s Switchcraft 3-Way Toggle or the two-output-tag version, with 4-conductor humbuckers and 500k pots.
How common this circuit is in our library
Of the 330 diagrams in our library, 69 pair two 4-conductor humbuckers with a Switchcraft-style 3-way toggle: 50 from Seymour Duncan sheets, 10 from DiMarzio and 9 from Tonerider. The capacitor values split cleanly by maker. Of the 69, 34 Seymour Duncan drawings use a .047 µF tone capacitor and none uses .022 µF. DiMarzio drawings use .022 µF in 9 and .047 µF in 1 (the Randy Rhoads Sandoval Dot V). Tonerider uses .022 µF in all 7 that have a tone control. The rest have no tone capacitor.
Both values give a working circuit with a different voicing, and each maker’s sheet is the reference for its own pickups. The section on capacitor values below explains the difference.
Identify the toggle’s lugs before you solder
Seymour Duncan’s toggle guide describes three switch families with different lug layouts:
| Switch | Pickup lugs | Output | Ground |
|---|---|---|---|
| Switchcraft-style open frame (straight, short or right-angle) | Outer lugs, never bent together | Two lugs bent together or jumpered | One lug, often longer or thicker |
| Import box toggle (on-on-on DPDT, four lugs) | The two either side of the middle | Middle lug of the three | Single lug on the other side |
| 3-way mini toggle (six lugs) | Group at each end | The middle | Not stated |
The catalog records the same two Switchcraft variants. The Switchcraft 3-Way Toggle has four tags: Tag 1, Tag 2, Tag 3 (common) and Tag 4 (frame ground). The two-output-tag version has five: two pickup tags, two common tags that you join with a jumper, and a frame ground tag. DiMarzio’s sheets call for the second type, the Switchcraft EP1101 (straight) or EP1102 (straight short), as shown on its PAF 36th Anniversary straight toggle sheet.
A drawing tells you which lug does what. It does not tell you how your switch is stamped, so map it with a meter set to continuity:
| Lever | Output lug to neck-side lug | Output lug to bridge-side lug | Frame lug to anything signal |
|---|---|---|---|
| Up | Closed | Open | Open |
| Middle | Closed | Closed | Open |
| Down | Open | Closed | Open |
Whichever outer lug is closed with the lever up takes the neck signal. If the frame lug ever reads closed to a signal lug, stop: the switch is damaged or the lug is misidentified.
Prepare the humbuckers: why the series link must be insulated
A 4-conductor humbucker brings both ends of both coils out. For standard series humbucking you join one end of each coil (the series link), take a third wire as hot and ground the fourth with the bare shield. The colours depend on the maker:
| Maker | Hot | Ground | Series link, joined and insulated |
|---|---|---|---|
| Seymour Duncan | Black | Green and bare | Red and white |
| DiMarzio | Red | Green and bare | Black and white |
| Tonerider (AC and H series) | Red | Green and bare | Black and white |
Sources: Seymour Duncan’s humbucker internals article, DiMarzio’s 4-conductor pickup instructions and Tonerider’s 2 humbuckers, 2 volumes, 2 tones sheet, which says “Solder Black and White wires together, and insulate with heat shrink or electrical tape”. DiMarzio warns that other brands may use the same colours with different connections. For other makes, see the Seymour Duncan wire colour guide and Gibson vs Fender pickup wire colour codes.
The series link is the electrical midpoint of the pickup. If it touches a grounded pot casing or the cavity shielding, the coil between the link and the ground wire has ground at both ends and drops out. The pickup then plays as a single coil, with less output and no hum cancelling. A coil split does the same thing on purpose (see coil split wiring diagram). It is also why every drawing in this article includes a check that the taped joint reads open to ground.
Walkthrough: two humbuckers, toggle, one volume, one tone
The simplest two-humbucker circuit puts the toggle before a single master volume and tone. Our drawing of Seymour Duncan sheet 2H_3G_1V_1T is the reference here.
Two humbuckers with a three-way toggle, one volume and one tone, drawn by Tinkercaster from Seymour Duncan diagram 2H_3G_1V_1T.
Parts, connections and bench checks ↗Open interactive diagram ↗The diagram lists these parts and values: two 4-conductor humbuckers in Seymour Duncan colours, an unlabelled 3-way toggle (compatible example: Switchcraft 3-Way Toggle), a 500k volume and a 500k tone (compatible example: CTS 500k Audio Pot), a .047 µF capacitor (Orange Drop .047µF), an output jack (Switchcraft #11) and the bridge ground wire. The original sheet is at seymourduncan.com.
The connections, in the diagram’s own terms, grouped by what they do:
Signal path
- Neck black → Toggle neck lug. Bridge black → Toggle bridge lug. Each hot goes to its own outer contact.
- Toggle middle lug → Volume left lug (input). The selected pickup enters the volume at one end of its track.
- Volume middle lug → Jack tip. The wiper is the output.
Tone network
- Volume left lug → Tone left lug. The tone pot hangs on the volume input, so it acts on the pickup signal before the volume.
- Tone middle lug → .047 cap, and the .047 cap → Tone casing. The pot is a variable resistor in series with the capacitor to ground. At full tone, 500k in series with the cap barely shunts anything. As the resistance falls, the capacitor increasingly shunts high frequencies to ground.
Series links
- Neck red → Neck white, and Bridge red → Bridge white, soldered together and taped off.
Ground network
- Neck green and bare, and Bridge green and bare → Volume casing.
- Volume right lug → Volume casing (lug bent onto the casing). This grounds the far end of the volume track, so the pot is a voltage divider: wiper at the input end is full volume, and wiper at the grounded end is silence.
- Toggle frame lug → Volume casing. Tone casing → Volume casing. Tone casing → Jack sleeve. Bridge ground wire → Tone casing.
What each position does, from the diagram:
| Toggle | Pickups on | Source |
|---|---|---|
| Rhythm (neck) | Neck pickup, both coils | Neck pickup |
| Both | Neck and bridge pickups, both coils, in parallel | Neck and bridge together |
| Treble (bridge) | Bridge pickup, both coils | Bridge pickup |
The same circuit with a .022 µF capacitor appears on DiMarzio’s sheet, drawn in our library as humbucker neck and bridge with a three-way toggle, and on Tonerider’s, drawn as two humbuckers, three-way toggle, one volume and one tone. The DiMarzio version joins the toggle’s two output tags with a jumper and puts the tone signal into the tone pot’s wiper with the capacitor on an end lug, which is the same network in a different order. If you want to leave the tone out, see two humbuckers with a three-way toggle and one volume.
Why 500k, and what the capacitor value changes
Every pot in a passive guitar sits across the pickup as a resistive load. Seymour Duncan’s 250k vs 500k article explains that a resistive load lowers the amplitude of the pickup’s resonant peak, and that a lower resistance attenuates the high frequencies harder. All three makers specify 500k pots for these humbucker circuits. DiMarzio’s 4-conductor instructions call 500k the most common value for humbuckers. 250k vs 500k pots covers the trade-off in full.
The capacitor sets where the tone control starts cutting as you turn it down. A larger capacitor reaches lower frequencies. Seymour Duncan’s own Les Paul wiring article names 0.022 µF as the standard value and .047 µF as an option “for a beefier sound”, yet 34 of Seymour Duncan’s two-humbucker toggle sheets in our library specify .047 µF. The maker’s editorial advice and its drawings disagree here. Use the value on the sheet you are following, or choose one deliberately.
Les Paul wiring: two volumes, two tones, and the 50s versus modern choice
A Les Paul puts each pickup through its own volume and tone before the toggle. The toggle then selects between the two volume outputs. Where the tone capacitor connects is what separates “50s” from “modern” wiring. Seymour Duncan’s Les Paul wiring article defines both:
- 50s: the tone pot’s outer lug connects through the capacitor to the volume’s middle lug.
- Modern: the tone pot connects to the volume’s outer lug, where the pickup’s hot lead is wired.
The same article describes the audible difference. 50s wiring keeps more high end as you turn the volume down, has more interactive controls and loses some volume when you turn the tone down. Modern wiring holds volume better as you roll it down, at the cost of some high end.
Tonerider publishes both versions, which gives a clean comparison from one maker.
Two humbuckers, toggle, two volumes, two tones (50s wiring), drawn by Tinkercaster from Tonerider diagram 2_HB_2V_2T_50s_wiring.
Parts, connections and bench checks ↗Open interactive diagram ↗The sheet calls for two 4-conductor humbuckers (Tonerider AC and H series), a 3-way toggle, four 500kA pots and two .022 µF capacitors (Orange Drop .022µF). The sheet is published at tonerider.com.
Using the drawing’s lug numbers (lug3 is the input end, lug2 the wiper and lug1 the grounded end), for each pickup:
| Connection | 50s (our drawing) | Modern (our drawing) |
|---|---|---|
| Pickup red (hot) | Volume lug3 | Volume lug3 |
| Volume lug1 | Volume casing | Volume casing |
| Volume lug2 (wiper) | Toggle neck or bridge tag | Toggle neck or bridge tag |
| Capacitor lead A | Volume lug2 (wiper) | Volume lug3 (input) |
| Capacitor lead B | Tone lug1 | Tone lug2 |
| Toggle common tag | Jack tip | Jack tip |
| Toggle frame tag, jack sleeve, bridge ground | Ground network | Ground network |
The two versions differ only in which volume lug feeds the capacitor and which tone lug the capacitor lands on. The 50s tone network hangs on the volume output, so it interacts with the volume setting. The modern network hangs on the pickup directly, so it does not.
DiMarzio’s approach differs again. On its PAF 36th Anniversary straight toggle sheet, drawn in our library as Les Paul 50s wiring (658), the pickup’s red lead goes to the volume’s middle lug, and the toggle is fed from the volume’s bottom lug.
Les Paul 50s wiring (658), drawn by Tinkercaster from DiMarzio diagram PAF 36th Anniversary with Straight Toggle Switch.
Parts, connections and bench checks ↗Open interactive diagram ↗In that drawing each capacitor runs from the volume’s middle lug to the tone’s bottom lug, and the tone’s middle lug is linked to its casing. The parts are EP1201 500K custom-taper pots, .022 µF EP1022 capacitors and a Switchcraft EP1101 or EP1102 toggle with its two output tags jumpered.
This arrangement changes the middle-position behaviour. In the Tonerider drawings, each volume’s wiper feeds the toggle. With the toggle in the middle, turning either volume fully down puts that wiper on the grounded lug, which grounds the joined toggle output and silences both pickups. In the DiMarzio drawing, the toggle sees each pickup through the volume’s track. Turning one volume down grounds that pickup at the wiper, while the toggle output still sees ground only through that pot’s resistance, so the other pickup keeps playing. Neither sheet prints this. It is our reading of the drawn circuit, so confirm it at the bench with the meter checks below.
Seymour Duncan’s 2 humbuckers, 2 volumes, 2 tones sheet specifies .047 µF capacitors for both tone controls. Our library draws Seymour Duncan’s two-volume variants as two humbuckers with a three-way toggle, two volumes and one tone, with a master tone, and two humbuckers with a three-way toggle and two volumes, with no tone. StewMac’s Switchcraft 3-way toggle page notes the Switchcraft toggle as the standard in Gibson and other two-pickup American guitars, and recommends shielded cable for the longer wiring runs. In a Les Paul that means the toggle-to-control-cavity leads.
Bench checks, position by position
Set the meter to resistance, unplug the guitar from any amp, and measure at the jack, tip to sleeve, with every pot on full. The library drawings list these checks, and the table explains what each reading means.
| Check | Expected | What a wrong reading means |
|---|---|---|
| Toggle up | The neck pickup’s DC resistance, slightly lower because the pots sit in parallel | Open: the neck path to the toggle is broken. Bridge value: the pickups are on swapped lugs |
| Toggle down | The bridge pickup’s DC resistance, slightly lower | As above, for the bridge |
| Toggle middle | Lower than either outer position (two pickups in parallel) | Same as one outer position: one pickup is not reaching its lug |
| Volume at zero (one-volume circuit) | A short in every position | Not a short: the volume’s ground lug is not grounded |
| Each taped series link to ground | Open | A reading: the link touches ground and that pickup is running as a single coil |
| Jumpered output tags (DiMarzio two-tag toggle) | Always a short to each other | Open: the jumper is missing or cold |
None of our drawings gives numeric pickup resistance, because the sheets do not. Compare against the published DC resistance for your exact pickup model. A meter shows continuity and resistance but cannot judge a joint, so inspect every joint as well. Our multimeter course covers continuity mapping and pickup measurement, and how to fix a dead pickup works through the open-circuit cases.
At the bench
Never solder with the guitar plugged into an amp. DiMarzio’s instructions recommend a fine-tip iron of 25 to 45 watts and thin rosin-core solder. Kester’s safety data sheet for its leaded solder wire says to avoid breathing fumes, ensure adequate ventilation, wash thoroughly after handling and not eat, drink or smoke while using it. The soldering cheat sheet and how to solder guitar wiring cover joint technique.
Next step
Open two humbuckers with a three-way toggle, one volume and one tone, or the Tonerider 50s drawing for a Les Paul, and compare its parts list with the pickups and switch in your guitar. The library, catalog and courses are free. To change the drawing, such as swapping in your capacitor value or moving to DiMarzio’s volume arrangement, open it in the workbench, where saving and customising the board is free too. Tinkercaster Pro adds Luthier for any connection you are unsure of (with a usage limit) and a guided build with meter checkpoints. When the base circuit works, coil split wiring diagram and series vs parallel wiring are the next modifications. The controls and switching course covers both.
References
From the Tinkercaster library
- Two humbuckers with a three-way toggle, one volume and one tone (Seymour Duncan 2H_3G_1V_1T)
- Humbucker neck and bridge with a three-way toggle (DiMarzio HH Wiring, 3-way toggle)
- Two humbuckers, three-way toggle, one volume and one tone (Tonerider 2_HB_1V_1T_3-way_toggle)
- Two humbuckers, toggle, two volumes, two tones (50s wiring) (Tonerider 2_HB_2V_2T_50s_wiring)
- Two humbuckers, toggle, two volumes and two tones (Tonerider 2_HB_2V_2T_3-way_toggle)
- Les Paul 50s wiring (658) (DiMarzio PAF 36th Anniversary, straight toggle)
- Catalog: Switchcraft 3-Way Toggle, Switchcraft 3-Way Toggle (two output tags), CTS 500k Audio Pot, Orange Drop .022µF, Orange Drop .047µF, Switchcraft #11
- Guide: Seymour Duncan humbucker wire colours. Courses: multimeter, controls and switching
Manufacturer and technical sources
- Seymour Duncan: Introduction to 3-way toggle switches: toggle families, lug layouts, position behaviour.
- Seymour Duncan: Humbucker internals explored: Seymour Duncan colour code and series link.
- Seymour Duncan sheet 2H_3G_1V_1T: one-volume circuit, 500k pots, .047 cap, red and white taped off.
- Seymour Duncan sheet 2H_3G_2V_2T: two-volume, two-tone circuit with .047 caps.
- Seymour Duncan: Les Paul wiring, 50s vs modern: definitions of 50s and modern wiring, their audible differences, 0.022 µF as standard.
- Seymour Duncan: 250k vs 500k pots: pot resistance as a load on the pickup’s resonance.
- DiMarzio: 4-Conductor Pickup Instructions: DiMarzio colour code, taping the series link, 500k as the common humbucker value, iron and solder recommendation.
- DiMarzio: PAF 36th Anniversary with straight toggle: pickup to volume middle lug, EP1101/EP1102 toggle, EP1201 pots, .022 µF EP1022 caps.
- Tonerider: 2 humbuckers, 2 volumes, 2 tones (50s wiring): 50s capacitor placement, 500kA pots, .022 µF.
- Tonerider: 2 humbuckers, 2 volumes, 2 tones (3-way toggle): modern capacitor placement, black and white series link instruction.
- StewMac: Switchcraft 3-way toggle switch: Switchcraft as the Gibson standard, shielded cable for long runs.
- Kester 245 lead alloy solder wire SDS: fume, ventilation and hand-washing precautions.